사용 프레임워크: React.js
배포 링크: https://kosy0907.github.io/Portfolio/
소스코드 링크: https://github.com/kosy0907/Portfolio (Public)
타입스크립트로 제작할까 하다가 TS는 아직 부족한 거 같아서 그냥 JS로 제작
언제나 그랬듯이 디자인 -> 구현 순서로 진행
디자인 못해서 여러 번 수정했다(지금도 수정중)
하지만 재밌죠?
Section은 3개로 나눴다.
Section1(Home) - Parallax Effect, Scroll Effect, Bounce Animation
Section2(About) - FadeIn Animation
Section3(Project) - Click-FadeIn Animation
시작은 npx create-react-app
미리 보는 component
1. Custom Cursor
웹사이트를 서치하다보면 가끔 둥글거나 다른 모양이 적용된 Cursor를 확인할 수 있다.
내심 어떻게 구현한 건지 궁금했는데 웹 사이트를 제작하면서 확실하게 알게 되었다.
import React, { useEffect, useRef } from 'react';
import './Cursor.css';

const Cursor = () => {
    const mainCursorRef = useRef(null);
    const subCursorRef = useRef(null);

    useEffect(() => {
        const onMouseMove = (e) => {
            const { clientX, clientY } = e

            mainCursorRef.current.style.transform = `translate3d(${clientX}px, ${clientY}px, 0)`;
            subCursorRef.current.style.transform = `translate3d(${clientX}px, ${clientY}px, 0)`;
            subCursorRef.current.style.transition = `all 0.15s`;
        }
        document.addEventListener('mousemove', onMouseMove);

        return () => {
            document.removeEventListener('mousemove', onMouseMove);
        }
    }, [])

    return (
        <div>
            <div className='mainCursor' ref={mainCursorRef} />
            <div className='subCursor' ref={subCursorRef} />
        </div>
    );
}

export default Cursor;
1. div에 useRef Hook을 사용해 mainCursorRef, subCursorRef를 걸고
2. useEffect Hook으로 마우스가 이동할 때마다 커서의 위치(clientX, clientY)를 업데이트 하는 이벤트 리스너를 추가한다.
3. subCursor(조금 더 큰 원)이 커서를 천천히 따라올 수 있도록 transition animation을 추가한다.
이렇게 하면 Component가 마운트되면 이벤트 리스너가 추가되고 언마운트되면 제거된다.
Custom Cursor 완성!
2. Section1 - Home
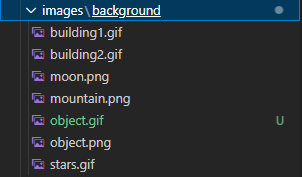
Parallax Effect를 넣고 싶어서 직접 제작한 픽셀아트 gif의 레이어를 밤하늘, 별, 건물, 산 등등으로 나눴다.
아이패드 없었으면 어쩔 뻔했어
예전에는 Steam에서 구매한 Aseprite 썼는데 아이패드로 하는 게 훨씬 편하고 빠르다.
진작에 프로크리에이트 쓸걸
잠깐! 포토샵을 사용한 이유는?
픽셀아트는 캔버스 사이즈가 작기 때문에 (보통 200x200) 막 늘려서 웹페이지에 적용했다가는 이미지가 깨질 수 있다.
포토샵으로 레이어 하나하나 크기를 늘려준다. 귀찮은 작업일 수 있지만 픽셀아트는 이것마저 재밌다.
image 폴더에 쏙
// Section1
import React, { useEffect, useState } from 'react';
...

function Section1(props) {
    // parallax
    const [position, setPosition] = useState(0);

    const onScroll = () => {
        setPosition(window.scrollY);
    }
    const toAbout = () => {
        props.aboutRef.current?.scrollIntoView({ behavior: 'smooth' });
    }

    useEffect(() => {
        window.addEventListener('scroll', onScroll);
        return () => {
            window.removeEventListener('scroll', onScroll);
        }
    }, []);

    return (
        <div className='home'>
            <div className='introBg'>
                <div className='intro bg1' style={{ backgroundPositionY: position }} />
                <div className='intro bg2' style={{ backgroundPositionY: position }} />
                <div className='intro bg3' style={{ backgroundPositionY: position / 2 }} />
                <div className='intro bg4' style={{ backgroundPositionY: position / 2 }} />
                <div className='intro bg5' style={{ backgroundPositionY: position / 3 }} />
                <div className='intro bg6' style={{ backgroundPositionY: position / 10 }} />

                <div className='intro cover'>
                    <div className='text'>
                    // Vertical Scrolling Text
                        <div className='scrollContainer'>
                            <div className='scrollBox'>
                                ...
                            </div>
                        </div >

                        <div className='fixed-container'>
                            ...
                        </div>
                        // Arrow Bounce Animation
                        <div style={{ marginTop: "3rem" }}>
                            <FontAwesomeIcon className='bounceArrow' icon={faAngleDown} size="2x" />
                        </div>
                       	<div className='toAboutBtn' onClick={toAbout}>About Me</div>
                    </div >
                </div >

            </div >
        </div >
    );
}

export default Section1;
intro bg1~bg6은 각각 위에서 만든 픽셀아트 레이어들을 담는 div이다.
intro cover로 전체 화면을 어둡게 덮고 그 위에 Scrolling text 애니메이션과 Bounce Animation을 적용했다.
특정 환경에서는 PositionY의 값이 변경될 수 있다.
toAboutBtn은 클릭 시 바로 About Section으로 스크롤 되도록 구현했다.
레이어 나눈 보람이 있다
// Navbar
import React, { forwardRef } from 'react';
import './Navbar.css';

function Navbar(props) {

    const HomeClick = () => {
        props.setNavState(1);
        window.scrollTo({ top: 0, behavior: 'smooth' });
    }

    const AboutClick = () => {
        props.setNavState(2);
        props.aboutRef.current?.scrollIntoView({ behavior: 'smooth' });
    }

    const ProjectClick = () => {
        props.setNavState(3);
        props.projectRef.current?.scrollIntoView({ behavior: 'smooth' });
    }

    return (
        <nav>
            <ul>
                <li className='navBtn' onClick={HomeClick}>HOME<span>.</span></li>
                <li className='navBtn' onClick={AboutClick}>ABOUT<span>.</span></li>
                <li className='navBtn' onClick={ProjectClick}>PROJECT<span>.</span></li>
            </ul>
        </nav>
    );
}
export default forwardRef(Navbar);
App.js(부모 컴포넌트)에서 props를 통해 setNavState, 다른 Section 컴포넌트(About, Project)를 가져온다.
Navbar에 있는 버튼을 클릭할 때마다 각각 HomeClick, AboutClick, ProjectClick 함수가 호출되어 부드럽게 스크롤 되도록 구현했다.
3. Section2 - About
간단한 소개와 Education, Certificate, 사용 가능한 Skill을 담은 컴포넌트이다.
Education과 Certificate를 넣는 게 맞는 선택일까 고민했지만 그냥 넣었다.
import React, { forwardRef, useEffect } from 'react';
import './Section2.css';

function Section2(props, aboutRef) {

    useEffect(() => {
        const observer = new IntersectionObserver(
            entries => {
                entries.forEach(entry => {
                    if (entry.isIntersecting) {
                        entry.target.classList.add('fadeIn');
                    } else {
                        entry.target.classList.remove('fadeIn');
                    }
                });
            },
            { threshold: 0.2 }
        );

        const targets = document.querySelectorAll('.fadeTarget');
        targets.forEach(target => observer.observe(target));

        return () => observer.disconnect();
    }, []);

    return (
        <div className='about' ref={aboutRef}>
            <div className='container'>
                <div className='title fadeTarget'>
                    <p>About Me</p>
                </div>
                <div className='aboutContent fadeTarget'>
                    ...
                </div>
            </div>
        </div>
    );
}

export default forwardRef(Section2);
Home에서 About으로 스크롤 시 fade in 애니메이션으로 나타나게끔 구현했다.
여기서는 Intersection Observer를 사용했다.
1. 컴포넌트가 마운트될 때 IntersectionObserver를 생성하고
2. Observer가 관찰할 수 있도록 애니메이션을 줄 div에 'fadeTarget' 클래스를 추가한다.
3. 여기서 style에 animation delay를 줘서 애니메이션을 늦출 수 있다.
4. css에 fadeIn 애니메이션을 설정하면 끝!
4. Section3 - Project
Navbar의 Project 버튼을 클릭하거나 About Section에서 밑으로 스크롤하면 나타난다.
projectTitle을 Click했을 때, 프로젝트 정보를 담은 card가 fade in animation으로 cardContainer에 나타나게 구현하고 싶었다.
// section3(project)
	...
	const handleItemClick = (item) => {
        if (selectedItem === null) {
            setSelectedItem({ ...item, show: true });
            setIsCardVisible(true);
        } else if (selectedItem.id !== item.id) {
            setSelectedItem({ ...item, show: true });
            setIsCardVisible(false);
            setTimeout(() => setIsCardVisible(true), 500);
        }
    };
    ...
    return (
    	...
        <div className='projectTitle'>
        ...
        <div className='cardContainer>
        ...
    )
// Card.js
import React, { useEffect, useState } from 'react';
import './Card.css';
function Card(props) {
const { item } = props;
const [showCard, setShowCard] = useState(false);
useEffect(() => {
if (item.show) {
setTimeout(() => {
setShowCard(true);
}, 20);
}
}, [item]);
return (
<div className={`card ${showCard ? 'show' : ''}`}>
<div className="cardTitle">{item.title}</div>
<div className="cardDescription">{item.description}</div>
</div>
);
}
export default Card;하지만, 이렇게 하면 다른 projectTitle을 클릭했을 때, 가끔씩 애니메이션이 적용되지 않는 문제 가 있었다.
원인은 handleItemClick의 setTimeout이 문제였다.
setTimeout은 시간을 정확하게 보장하지 않기 때문에, 대신 requestAnimationFrame 을 사용하는 것이 좋다.
requestAnimationFrame은 브라우저의 리플로우, 리페인트 과정을 최적화하면서 실행되기 때문에, 애니메이션 효과를 좀 더 부드럽게 적용할 수 있다.
// section3 수정
    const handleItemClick = (item) => {
        if (selectedItem === null) {
            setSelectedItem({ ...item, show: true });
            setIsCardVisible(true);
        } else if (selectedItem.id !== item.id) {
            setSelectedItem({ ...item, show: true });
            setIsCardVisible(false);
            window.requestAnimationFrame(() => setIsCardVisible(true));
        }
    };
5. App.js
...

function App() {
  const [scrollIndex, setScrollIndex] = useState(1);
  const [navState, setNavState] = useState(1);
  const aboutRef = useRef(null);
  const projectRef = useRef(null);

  useEffect(() => {
    if (navState === 1) {
      setScrollIndex(1);
    } else if (navState === 2) {
      setScrollIndex(2);
    } else if (navState === 3) {
      setScrollIndex(3);
    }
  }, [navState])

  useEffect(() => {
    const wheelHandler = (e) => {
      ...
    };

    document.addEventListener("wheel", wheelHandler);
    return () => {
      document.removeEventListener("wheel", wheelHandler);
    };

  }, []);

  return (
    <div className="App">
      <Cursor />
      <Navbar aboutRef={aboutRef} projectRef={projectRef}
        setNavState={setNavState} />
      <div className='section'>
        <Dots scrollIndex={scrollIndex} />
        <Section1 />
        <div className="divider" />
        <Section2 ref={aboutRef} />
        <div className="divider" />
        <Section3 ref={projectRef} />
      </div>
      <Footer />
    </div>
  );
}

export default App;
App.js에는 Navbar에 Section을 넘겨주고 컴포넌트를 리턴하도록 구현했다.
마우스 스크롤 시 부드럽게 움직이도록 wheelHandler 함수를 추가했다.